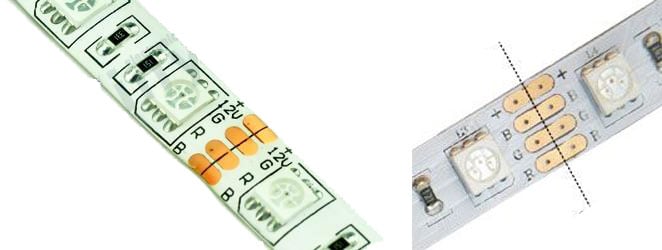
Step 01 – Take your LED strips and navigate their wire outlet. It should show 4 pins female type socket. In here, you may see respective wires as Red, Green, Blue, and Black. Then, connect 4 pins male connector into the LED strip’s female connector.
Sometimes, you can have LED strips that do not have any socket—just copper wire sockets.
In this case, you need to solder a male pin connector to these copper pads (I hope you have basic soldering skills). Once you have soldered a male connector, you can use it for next steps.

Step 02 – Now, take your controller. It has another female connector with 4 pin configuration. Carefully examine the pin connection and connect your LED strip’s 4 pin male connector into this female connector. Red = Red, Green = Green..etc.
Make sure to seal your connectors properly using a sealing tape.
Step 03 – To connect the power, you can use your 12 power adaptor. Once you have connected your power adaptor, it will make LED strips turn ON with the power.
Step 04 – All right, now you need to install a supporting app on your mobile phone. The link to the app can be found through the QR code in the controller. After installing this app, connect your mobile into the controller’s LED Wi-Fi network.
If you did not see the LED strip’s network, then reset your controller 4 times by turn on and off.
Step 05 – Then, log into the app and click the plus icon. It will redirect you to an option “Direct connect the device control”. Use this to connect your app to your home Wi-Fi network.
Step 06 – When you are finalizing step 05, it will ask you to give a name for your device. You can see this name in your Alexa devices. After this, it is pretty simple to control it via voice commands. You can follow your normal steps to add and control your new device through Alexa or Google Home.
This Youtube video has similar steps that I have mentioned in my article. You can watch this if you want some additional insights.
